

Introduction
A fire pit can be the centerpiece of your outdoor space, providing warmth, ambiance, and a perfect spot for gathering with family and friends. Building your own fire pit is a rewarding DIY project that can enhance your backyard and extend your outdoor living season. This step-by-step guide will show you how to create a beautiful, functional, and safe fire pit.
Benefits of a Fire Pit
Adding a fire pit to your outdoor space offers numerous advantages:
- Year-round enjoyment: Extend your outdoor season with warmth on cool evenings.
- Social hub: Create a gathering spot for friends and family.
- Cooking: Enjoy cooking over an open flame with fire pit accessories.
- Property value: Enhance your backyard’s appeal and potentially increase property value.
Choosing the Right Location
Selecting the right location for your fire pit is crucial for safety and enjoyment:
- Distance from structures: Ensure the fire pit is at least 10-20 feet away from buildings, trees, and other flammable structures.
- Level ground: Choose a flat, level area to prevent uneven burning and tipping.
- Wind protection: Select a spot with some natural wind protection to control smoke and flames.
- Accessibility: Place the fire pit in an easily accessible area, ideally close to seating and outdoor amenities.
Materials and Tools Needed
Gather the following materials and tools for your fire pit project:
- Materials:
- Fire pit blocks or bricks
- Fire-resistant adhesive
- Gravel or lava rocks
- Fire pit insert or ring (optional)
- Tools:
- Shovel
- Level
- Tape measure
- Tamper or hand tamper
- Rubber mallet
Step-by-Step Fire Pit Construction
- Plan and Measure: Decide on the size and shape of your fire pit. Measure and mark the area using stakes and string or spray paint. A common size is 3-4 feet in diameter.
- Excavate the Area: Dig out the marked area to a depth of about 6-8 inches. Remove any grass, roots, and debris.
- Create a Base: Add a 2-3 inch layer of gravel or lava rocks to the excavated area. Use a tamper to compact the base, ensuring it is level and stable.
- Lay the First Layer of Blocks: Place the first layer of fire pit blocks or bricks on the compacted base. Use a level to ensure each block is even and adjust as necessary.
- Build Up the Walls: Apply fire-resistant adhesive to the top of the first layer of blocks, then place the next layer on top. Stagger the joints for added stability. Continue building up the walls to your desired height, typically 2-3 layers.
- Install the Fire Pit Insert or Ring: If using a fire pit insert or ring, place it inside the completed fire pit structure. This will help protect the blocks from direct flame and extend the life of your fire pit.
- Fill with Gravel: Add another layer of gravel or lava rocks inside the fire pit, filling it to just below the top layer of blocks. This helps with drainage and provides a stable surface for the fire.
Safety Tips
Ensure your fire pit is safe for use by following these safety tips:
- Check local regulations: Verify any local codes or restrictions regarding fire pits in your area.
- Clear the area: Remove any flammable materials or debris around the fire pit.
- Use proper fuel: Burn only seasoned firewood or appropriate fire pit fuel. Avoid using accelerants like gasoline.
- Keep water nearby: Have a hose, bucket of water, or fire extinguisher readily available.
- Supervise fires: Never leave a fire unattended and ensure it is completely extinguished before leaving the area.
Enjoying Your Fire Pit
Once your fire pit is complete, it’s time to enjoy it! Here are some ways to make the most of your new outdoor feature:
- Seating: Arrange comfortable seating around the fire pit for gatherings.
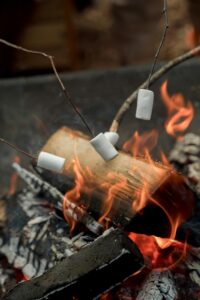
- Cooking: Invest in fire pit cooking accessories like grills, skewers, or marshmallow roasting sticks.
- Ambiance: Enhance the atmosphere with outdoor lighting, cushions, and blankets.
- Games and activities: Plan outdoor games and activities that can be enjoyed around the fire.
Conclusion
Building a fire pit is a rewarding project that adds value and enjoyment to your outdoor space. With the right materials, tools, and steps, you can create a beautiful, functional, and safe fire pit. Whether you’re roasting marshmallows, sharing stories, or simply enjoying the warmth, your fire pit will become a cherished feature of your backyard. Start your project today and create memories that will last a lifetime.
Check out these essential backpacking gear items!
I didn’t even think about how to build a fire pit. I should know considering I grew up in the woods, as it would definitely be safer than some of the burn piles we use, however, it isn’t too late to learn.
Thank you! We want to build some of these for the summer to make some s’mores
We have a firepit at home. We built it not long ago too. It’s really nice to have too. We especially love having fires when we have get togethers.
This is something that sounds easy to build. It will be perfect for summer parties.
Thank you so much for this detailed guide on building a fire pit! As a mom who loves spending time outdoors with my family, I really appreciate the step-by-step instructions and safety tips.
We love our fire pit at our home! It’s great sharing it with friends and family! Thank you for all the great tips!
This is such a great post. My son in-law built us one and one for his home and we love it. I love when nightfall comes, and we all sit around it and enjoy each other’s company.
Such a great post, I will be sharing this post with family and friends, they love doing diy projects in the summer time.
I wish we could have a fire pit at our house! However, we can make one if we go camping. Great tips, and your fire looks great. It is fun to enjoy a good fire.
I really wish that I could have a fire pit. I rent my lot and I don’t think my landlord would approve. It would be nice to have to grill some food too.
It would be nice to have a fire pit but I think I’d be anxious while outside because we have bears around here. LOL.
this sounds so very cool.. but unfortunately not in our current home where backyard space is just right at this time..