Introduction
If you’re looking to add a touch of charm and character to your home, a rustic barn door is the perfect DIY project to tackle. Not only does it create a stunning focal point, but it’s also a functional space-saver that’s surprisingly easy to build! Whether you’re a seasoned DIYer or a beginner with a weekend to spare, this step-by-step guide will walk you through building your very own rustic barn door — no carpentry degree required! Plus, building it yourself gives you the freedom to customize the design, ensuring it fits your home’s unique style. Get ready to roll up your sleeves and create something you’ll be proud to show off.
Why Choose a Rustic Barn Door?
Rustic barn doors aren’t just for farms anymore. They’ve become a stylish interior feature, adding warmth and personality to any room. Perfect for bedrooms, pantries, closets, or even as a decorative statement piece — these sliding beauties are both trendy and timeless. Their versatility allows them to complement everything from modern farmhouse aesthetics to cozy cottage-style homes. Best of all, they maximize space by sliding along the wall rather than swinging open, making them perfect for small spaces.
Materials You’ll Need
Before you get started, gather these materials:
- Wooden planks (pine, cedar, or reclaimed wood work beautifully)
- Wood screws or nails
- Wood glue
- Sliding barn door hardware kit
- Sandpaper (medium and fine grit)
- Wood stain or paint of your choice
- Measuring tape
- Saw (circular or table saw recommended)
- Drill
- Level
- Protective gear (gloves, goggles, etc.)
Choosing quality materials is key to building a barn door that’s durable and long-lasting. If you’re using reclaimed wood, inspect it for cracks, warping, or damage to ensure stability. Investing in sturdy hardware is equally important — a smooth-gliding track can make all the difference.
Step 1: Measure Your Space
First things first — measure your doorway! Barn doors should be slightly larger than the door opening to ensure proper coverage. Add about 2 inches to the width and 1 inch to the height. This will give your door that perfect oversized barn look.
Don’t forget to measure the wall space where the door will slide open. You’ll need at least the same width as your door to ensure it has enough room to glide smoothly without hitting anything. Taking accurate measurements at the start will save you frustration later on.
Step 2: Cut and Assemble the Planks
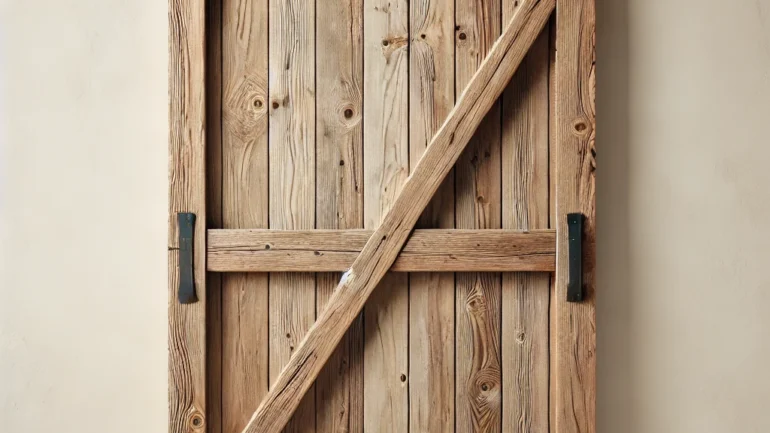
Lay your planks side by side until they reach your desired door width. Use wood glue to secure them together, then reinforce the structure by screwing or nailing horizontal planks across the top and bottom. For added style (and stability), consider adding a diagonal brace or a classic Z-shape across the middle.
When positioning your horizontal or diagonal braces, measure carefully to ensure everything is centered. This step not only strengthens your door but also gives it that signature barn-style charm. Take your time aligning the boards to keep everything neat and symmetrical.
Step 3: Sand It Down
Now that your door is assembled, it’s time to smooth things out. Use medium-grit sandpaper to eliminate rough edges, then finish with fine-grit sandpaper for a silky-smooth surface. This step ensures your stain or paint applies evenly.
Be sure to pay special attention to corners and edges to prevent splinters. Sanding also helps bring out the natural grain of the wood, enhancing its rustic character. Don’t rush this step — smooth wood will absorb stain or paint more evenly for a polished look.
Step 4: Stain or Paint Your Door
This is where your rustic vision comes to life! Choose a warm wood stain for that classic farmhouse feel, or go bold with a distressed paint finish. Don’t forget to apply a protective sealant to keep your masterpiece looking fresh for years to come.
For a truly rustic look, try layering different stains or lightly sanding over painted sections to create a weathered effect. This technique gives your barn door an authentic, aged appearance that’s perfect for farmhouse decor.
Step 5: Install the Sliding Hardware
Follow the instructions provided with your sliding barn door hardware kit. Most kits include a track, rollers, and mounting brackets. Use a level to ensure everything is perfectly aligned — you don’t want a crooked door after all that hard work!
It’s also a good idea to double-check that your screws are anchored securely in wall studs to support the door’s weight. If your door is especially heavy, consider adding extra wall anchors or reinforcements for added stability.
Step 6: Hang Your Door
Once your hardware is secure, carefully lift your barn door onto the track. Test it to ensure it slides smoothly, and make any necessary adjustments.
This is a great time to test the floor clearance as well — you’ll want your door to hover just above the floor without scraping. Don’t hesitate to step back and admire your work once it’s hung — it’s satisfying to see your hard work pay off.
Step 7: Add Finishing Touches
For a true rustic vibe, consider adding decorative handles, vintage hardware, or metal corner brackets. These small details make a big difference in giving your barn door that authentic charm.
Black iron handles, antique knobs, or even sliding door locks can add a stylish yet practical touch. Mixing metals like brushed nickel or bronze can also elevate the design and complement your home’s aesthetic.
Step 8: Show It Off!
Now that your DIY barn door is complete, step back and admire your handiwork. Snap a picture, brag to your friends, and enjoy your new statement piece. Trust me — you’ll find yourself sliding it open and closed just for fun!
If you’re proud of your work (and you should be!), consider sharing your finished project on social media or home improvement forums. Inspiring others to create their own rustic barn door is a great way to connect with fellow DIY enthusiasts.
Pro Tips for Success
Use reclaimed wood for a truly authentic rustic feel.
Pre-drill holes before screwing planks together to prevent wood from splitting.
For a farmhouse finish, lightly sand the edges after painting to give it that weathered look.
Don’t be afraid to experiment with finishes, colors, or hardware to make the design your own. Every rustic barn door has its own personality — let yours reflect your creativity!
Conclusion
Building your own rustic barn door isn’t just a DIY project — it’s a creative adventure that adds character to your home. Whether you’re upgrading your pantry or enhancing your bedroom’s charm, this fun weekend project is sure to impress. So grab your tools, channel your inner craftsman, and start building! With a little time and effort, you’ll have a custom barn door that’s as beautiful as it is functional


